As I had mentioned in the beginning of the How-To, I was describing every step by memory and trying to carefully think about the process. At least I hope I mentioned that! Well, as luck would have it, I just finished a cabinet using 3/4" birch plywood and I have just enough scrap left to take pictures of the process and materials. So, when the free time comes available I will spend a few weekends photographing and re-covering the process of building a basic 2'x4' free-mo standard based module.
Please keep an eye on the blog as it may be this weekend when I start the project. It also helps to have the new camera too.
So, I will post again shortly!
John
Tuesday, March 9, 2010


Thursday, March 4, 2010
Carter's 3rd Birthday Party
This past weekend was Carter's 3rd birthday party, held at Rolandia/Magic Castle. Everyone had a great time, especially Carter! Pizza, cake, presents and arcade games, what more could he need. He got a lot of neat presents, but probably his favorite is the Imaginarium train table with some Thomas wooden trains.
Here are some pictures from the party and at home afterwards.


So, until the next post, God Bless.
John, "Pop"
Here are some pictures from the party and at home afterwards.


So, until the next post, God Bless.
John, "Pop"
Friday, February 19, 2010
Still Learning Our Camera
Well, it's been about 10 days since getting our camera and I have been trying to absorb as much about photography and digital cameras, especially our, since our T1i arrived. And just when I thought I read and learned enough to start photographing the things I want to shoot, I find some video on YouTube, or a blog, or some other website with a bunch more information I never knew about.
Some videos I have been watching are from Bryan Peterson (YouTube - ppsop2009's Channel) , Rick Sammons (http://www.youtube.com/user/pixelmagic), CameraLabs.com (http://www.youtube.com/user/cameralabs) and PhotoClassPro (http://www.youtube.com/user/PhotoClassPro). These so far have been the most informative YouTube videos. If you are new to photography, or just looking for different techniques, I would suggest looking into these videos.
As far as websites go, my bookmark list has grown exponentially just in the last two weeks. So you can see where I've been, here are a list of some of the websites. Feel free to check them out!
Scott Kelby's Photoshop Insider Blog
Stare Photography School Online
DSLR Tips:
Digital Photography Tips
PhotoTips.biz
The Perfect Picture School of Photography
Not Your Normal School of Photography
The Photo Forum
Photography Forums
Digital Photography Review
Canon Digital Photography Forums
As you can see, I have probably let myself get consumed with this subject, which can be good or bad. It's good because I can possibly turn this hobby into a source of income in the future, and it will make me and Ashley better photog's. It's bad because I have spent a lot of (maybe too much) time online or in books reading instead of paying more attention to my wife and kids. Hopefully to former will pay off and support the latter. In other words, I hope we can in fact make at least a part time "business" out of photography and help pay for activities and vacations with the family.
On a side note, we have all been sick, so we haven't been in the mood or able to go take more pictures lately, but we are all finally getting over our illnesses and will hopefully be out shooting soon.
So, until the next post, God Bless.
Some videos I have been watching are from Bryan Peterson (YouTube - ppsop2009's Channel) , Rick Sammons (http://www.youtube.com/user/pixelmagic), CameraLabs.com (http://www.youtube.com/user/cameralabs) and PhotoClassPro (http://www.youtube.com/user/PhotoClassPro). These so far have been the most informative YouTube videos. If you are new to photography, or just looking for different techniques, I would suggest looking into these videos.
As far as websites go, my bookmark list has grown exponentially just in the last two weeks. So you can see where I've been, here are a list of some of the websites. Feel free to check them out!
Scott Kelby's Photoshop Insider Blog
Stare Photography School Online
DSLR Tips:
Digital Photography Tips
PhotoTips.biz
The Perfect Picture School of Photography
Not Your Normal School of Photography
The Photo Forum
Photography Forums
Digital Photography Review
Canon Digital Photography Forums
As you can see, I have probably let myself get consumed with this subject, which can be good or bad. It's good because I can possibly turn this hobby into a source of income in the future, and it will make me and Ashley better photog's. It's bad because I have spent a lot of (maybe too much) time online or in books reading instead of paying more attention to my wife and kids. Hopefully to former will pay off and support the latter. In other words, I hope we can in fact make at least a part time "business" out of photography and help pay for activities and vacations with the family.
On a side note, we have all been sick, so we haven't been in the mood or able to go take more pictures lately, but we are all finally getting over our illnesses and will hopefully be out shooting soon.
So, until the next post, God Bless.
Monday, February 15, 2010
Some cropping in Photoshop Camera Raw
Here is a picture Ashley took tonight of the barn, at dusk. The snow was falling and she was trying to capture that. The other 2 are the same picture cropped and made black and white and sepia tone, both with vignetting. Enjoy!


More shots with the new camera!
Here are some more pictures from the new camera. These were croped and adjusted using Adobe Photoshop and the Camera Raw plug-in.


Wednesday, February 10, 2010
Camera Arrived Today!
Today was a happy day! UPS came knocking on our door this morning with gifts. Our camera, printer and other equipment got here and man are we excited. We just spent about 2-4 hours reading the manual and trying things out on our new Canon EOS Rebel T1i dSLR. Since all Ash and I have ever really had for a camera were point-and-shoot cameras, this is deffinately the best we've ever had. We can't get over how sharp the pictures are with just basic settings and not really fine tuning anything. It's taking some getting used to the use of a view finder instead of just an LCD screen, or not having the option of a view finder I should say. We haven't tried much with the live view yet, but I'm sure that will come soon enough.
Well, here a couple of our first shots! We took over 60 in about a 30 minute period!
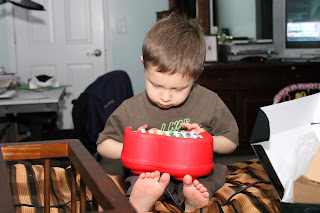

Well, here a couple of our first shots! We took over 60 in about a 30 minute period!


Sunday, February 7, 2010
New Camera Equipment Purchase!
This weekend, Ashley and I finally had the opportunity to buy a "real" digital camera. I think we've spent at least 3-6 months searching for the camera that would best fit us, and I have to say, it's almost like buying a new car if you aren't sure of what's out there.
What we decided on was a Canon EOS Rebel T1i DSLR kit. We had suggestions from friends and other people who do photography for either a living or just a hobby, and most of them came back for either a Nikon or a Canon. Some suggestions were for the more pricey cameras the pro's use, others were more in our price range. At first we had decided on the Canon XSi, but after further consideration went with the T1i instead. We really wanted a camera that would be great for getting pic's of the kids and family events, some sports and auto racing, railroad pictures and other shots that just cannot be done well with a point-and-shoot. We are done with the grainy, out of focus, poor quality shots we get with our Sony p-n-s. It has done it's job over the last 2 years we have had it, but it is not the best for action shots that are required when you have a 3 year old and a 7 month old.
Also with the camera we ordered some accessories. First is a dedicated flash from Vivitar and a mini softbox/light diffuser from Dot Line. We also got a UV filter to help protect the lens. For a memory card we picked up a SanDisk Ultra II SDHC 8GB card. And to carry everything around we chose a Canon backpack style bag that has enough room for all of our stuff and space to spare. And as an added bonus, there was a $400.00 rebate on a Canon Pixma P9000 printer, so we ordered it as well. And the cool thing about the printer rebate is that we are paying $446.00 before the rebate. So we get the printer for $46.00 and change.
Now, where are we buying all of this photographic awesomeness? A place in New York City called B&H Photo and Video. Of all of the places we shopped locally and online for what we wanted, B&H had the best prices and deals, and the people are great to deal with. At least the 2 Ash and I dealt with were. So we strongly recommend you check them out if you're in the market for photo and video equipment.
Also, we were recommended a couple books, or I should say an author, that are very informative and keep things light, without bogging you down with digi-cam techie jargon. The author is Scott Kelby and the books are called "The Digital Photography Books, Vol. 1-3". We got ours on loan from the library, but we will probably buy them later on down the road. Maybe when a book store has a sale or we get a coupon. Another book we were told to get was the "Rebel T1i for Dummies". This one we did buy since it was camera specific and we needed all the help learning this thing that we can get.
So, by Wednesday, the 10th, UPS should be knocking at our door with our equipment, as long as there isn't a delay because of the snow over the weekend. I'll eventually post some info and our thoughts on the camera after we play around with it for a few days.
Wish us luck, or pray for us, lol.
John
What we decided on was a Canon EOS Rebel T1i DSLR kit. We had suggestions from friends and other people who do photography for either a living or just a hobby, and most of them came back for either a Nikon or a Canon. Some suggestions were for the more pricey cameras the pro's use, others were more in our price range. At first we had decided on the Canon XSi, but after further consideration went with the T1i instead. We really wanted a camera that would be great for getting pic's of the kids and family events, some sports and auto racing, railroad pictures and other shots that just cannot be done well with a point-and-shoot. We are done with the grainy, out of focus, poor quality shots we get with our Sony p-n-s. It has done it's job over the last 2 years we have had it, but it is not the best for action shots that are required when you have a 3 year old and a 7 month old.
Also with the camera we ordered some accessories. First is a dedicated flash from Vivitar and a mini softbox/light diffuser from Dot Line. We also got a UV filter to help protect the lens. For a memory card we picked up a SanDisk Ultra II SDHC 8GB card. And to carry everything around we chose a Canon backpack style bag that has enough room for all of our stuff and space to spare. And as an added bonus, there was a $400.00 rebate on a Canon Pixma P9000 printer, so we ordered it as well. And the cool thing about the printer rebate is that we are paying $446.00 before the rebate. So we get the printer for $46.00 and change.
Now, where are we buying all of this photographic awesomeness? A place in New York City called B&H Photo and Video. Of all of the places we shopped locally and online for what we wanted, B&H had the best prices and deals, and the people are great to deal with. At least the 2 Ash and I dealt with were. So we strongly recommend you check them out if you're in the market for photo and video equipment.
Also, we were recommended a couple books, or I should say an author, that are very informative and keep things light, without bogging you down with digi-cam techie jargon. The author is Scott Kelby and the books are called "The Digital Photography Books, Vol. 1-3". We got ours on loan from the library, but we will probably buy them later on down the road. Maybe when a book store has a sale or we get a coupon. Another book we were told to get was the "Rebel T1i for Dummies". This one we did buy since it was camera specific and we needed all the help learning this thing that we can get.
So, by Wednesday, the 10th, UPS should be knocking at our door with our equipment, as long as there isn't a delay because of the snow over the weekend. I'll eventually post some info and our thoughts on the camera after we play around with it for a few days.
Wish us luck, or pray for us, lol.
John
Thursday, December 17, 2009
Update for everyone!
Sorry, yet again I've been to busy to post the next part in our series. Hopefully after the holidays I will have a change to write part 4.
See you then!
See you then!
Sunday, October 18, 2009
Module Construction 101: Part 3 – Material Preparation
Part 3 – Material Preparation
In this session, we'll discuss:
In this session, we'll discuss:
- Material Preparation – All of the cuts, holes and measurements that you’ll need.
Material Preparation
Now that you have all of your basic materials to build the module, let’s discuss what to do with them. I will first give you the material, a quantity and/or measurement of each part needed, then describe how you should make any cuts or where to drill holes. In the sections “Holes To Be Drilled”, please refer to the diagram below the descriptions. Hole locations will be marked to correspond with the Hole Set number.
Now that you have all of your basic materials to build the module, let’s discuss what to do with them. I will first give you the material, a quantity and/or measurement of each part needed, then describe how you should make any cuts or where to drill holes. In the sections “Holes To Be Drilled”, please refer to the diagram below the descriptions. Hole locations will be marked to correspond with the Hole Set number.

· Birch Plywood Cuts: 2 - 6”x48”x0.75”, 4 - 6”x22.5”x0.75”, 2 - 4”x22.5”x0.75”, 4 – 3.125”x1.5”x0.75”, 4 – 3.125”x2.125”x0.75”
If you picked up the 4’x4’ panel, here is how you need to cut it. First, lay out your first line 6” from the edge, along one of the 4’ lengths of the panel. This will be for the sides of your frame. You’ll want to make a line at 6”, then cut, make a second line at 6” and then cut. This way you’re sure to have 6” wide sides and not lose 0.125” (1/8”) because of the kerf of your saw blade. Now you should have two pieces that measure 6”x48”x0.75”.
If you picked up the 4’x4’ panel, here is how you need to cut it. First, lay out your first line 6” from the edge, along one of the 4’ lengths of the panel. This will be for the sides of your frame. You’ll want to make a line at 6”, then cut, make a second line at 6” and then cut. This way you’re sure to have 6” wide sides and not lose 0.125” (1/8”) because of the kerf of your saw blade. Now you should have two pieces that measure 6”x48”x0.75”.
o Holes to be drilled: All holes are about 1/8” for typical general purpose drywall screws.
Hole Set 1: Lay out 3 vertical holes on each end starting from the top at 1”, 3” and 5” and 3/8” from the end. Do this for both side rails. These holes will be for attaching the module end plates.
Hole Set 2: You need to lay out points for horizontal holes for the end supports. These holes will start at 2 3/8” from the top and three holes at 1¾”, 3¾”, and 5¾” from the end.
Hole Set 3: For the leg pockets, we need to drill 2 vertical holes on each end, 2 5/8” from the ends, 3 3/4” and 5 3/4” from the top.
Hole Set 4: Last are two sets of 2 holes for the center supports on each side rail. These holes are vertical. Measure 16” from the ends and draw a vertical line starting at 2” from the top. Then mark the holes at 3” and 5”.
Hole Set 1: Lay out 3 vertical holes on each end starting from the top at 1”, 3” and 5” and 3/8” from the end. Do this for both side rails. These holes will be for attaching the module end plates.
Hole Set 2: You need to lay out points for horizontal holes for the end supports. These holes will start at 2 3/8” from the top and three holes at 1¾”, 3¾”, and 5¾” from the end.
Hole Set 3: For the leg pockets, we need to drill 2 vertical holes on each end, 2 5/8” from the ends, 3 3/4” and 5 3/4” from the top.
Hole Set 4: Last are two sets of 2 holes for the center supports on each side rail. These holes are vertical. Measure 16” from the ends and draw a vertical line starting at 2” from the top. Then mark the holes at 3” and 5”.
Now you have your sides cut and drilled, time to cut the ends and end supports. Lay out one line 6” from the edge for your next cut. Cut along the line to give you one more 6”x48”x3/4” piece. With this part, you’ll want to cut it in half, minus 1.5”, giving you a 6”x22.5”x0.75” piece. Do this with the other half as well. Repeat this step a second time so that you end up with four 6”x22.5”x0.75” pieces.
We will now cut your center supports. Along the 48” side, on the factory edge, mark a line 4” from the edge and cut, giving you one 4”x48”x0.75” length of wood. Like the ends you just made, cut this in half minus 1.5” as well and cut 1.5” off of the other half. You should have two sections that measure 4”x22.5”x0.75”.
Lastly, we need to cut some small rectangular pieces for the leg pockets. Continue with this step if you decide not to use some method to have the legs fold underneath the module. With your left over part of the panel, you will need to cut out four 3.125”x1.5”x0.75” pieces and four 3.125”x2.125”x0.75” pieces. This will give you one of each for each corner.
Keep the scraps you have left over because we may use them for extra support in the future.
· Cutting the Legs and Cross Braces: 4 – 1.5”x1.5”x your desired length, 2 – ½”x2”22 ½”.
Let’s move on to preparing our legs. This step will be pretty simple and won’t take much time at all.
If you purchased a 2”x4”x8’ to make your legs, here is how you cut it down. To start, since most modules are only 30” to 50” to the top of the rail head, you can start by cutting the 2x4 in half at 48”. Then rip the two pieces down the middle, at 1 ½”. After you make your cuts, you will have 4 legs. You should be left with a couple strips ½”x1½”x48”. Keep these as you will be able to use them for bracing or support on your module.
If you purchased two 1½”x1½”x8’ furring strips, then you will simply cut the strips in half at first or to a length that will work for your desired module height.
The final length of your legs is determined by your modular organizations standards. But, as a simple rule to cut your legs, you’ll want to take your rail height and subtract the 2” for foam board thickness, ½”+/- for track and roadbed thickness (depends on brand of track and roadbed), ¾” for the horizontal end bracing, and about ½” for leveler height adjustment. So for example, if you are building to Free-mo standards of 50” rail height, you will cut your legs to 46¼”.
The cross braces are cut from 36” grade stakes. This is a simple cut, really. From the straight end, measure 22 ½” and cut the pointed end off.
Let’s move on to preparing our legs. This step will be pretty simple and won’t take much time at all.
If you purchased a 2”x4”x8’ to make your legs, here is how you cut it down. To start, since most modules are only 30” to 50” to the top of the rail head, you can start by cutting the 2x4 in half at 48”. Then rip the two pieces down the middle, at 1 ½”. After you make your cuts, you will have 4 legs. You should be left with a couple strips ½”x1½”x48”. Keep these as you will be able to use them for bracing or support on your module.
If you purchased two 1½”x1½”x8’ furring strips, then you will simply cut the strips in half at first or to a length that will work for your desired module height.
The final length of your legs is determined by your modular organizations standards. But, as a simple rule to cut your legs, you’ll want to take your rail height and subtract the 2” for foam board thickness, ½”+/- for track and roadbed thickness (depends on brand of track and roadbed), ¾” for the horizontal end bracing, and about ½” for leveler height adjustment. So for example, if you are building to Free-mo standards of 50” rail height, you will cut your legs to 46¼”.
The cross braces are cut from 36” grade stakes. This is a simple cut, really. From the straight end, measure 22 ½” and cut the pointed end off.
o Holes to be drilled:
The holes to be drilled in the legs are simple. Your first hole is to be drilled in the end of the leg directly in the center, 3/8”x2¼” . This hole will be for a ¼”-20 T-nut and either a 2”x¼”-20 carriage bolt, or a rubber table leg adjuster with the same thread and as close to the same length as possible.
Your second hole to be drilled will be a ¼” hole 10” from the bottom of the leg for a cross brace.
And finally, you’ll want to drill a ¼” hole in the cross braces at ¾” from each end.
The holes to be drilled in the legs are simple. Your first hole is to be drilled in the end of the leg directly in the center, 3/8”x2¼” . This hole will be for a ¼”-20 T-nut and either a 2”x¼”-20 carriage bolt, or a rubber table leg adjuster with the same thread and as close to the same length as possible.
Your second hole to be drilled will be a ¼” hole 10” from the bottom of the leg for a cross brace.
And finally, you’ll want to drill a ¼” hole in the cross braces at ¾” from each end.
· Cutting the Foam Board:
Your foam board probably came as a 4’x8’ sheet, so it will need to be cut to fit your frame. When cutting your foam, keep in mind the ¾” you need to allow for on all 4 sides. Your module frame outside dimensions will be 24”x48”, so you will need to cut your foam to 22½”x46½” so it will fit snugly inside the frame and will rest on top of the end support braces we cut in the beginning.
Your foam board probably came as a 4’x8’ sheet, so it will need to be cut to fit your frame. When cutting your foam, keep in mind the ¾” you need to allow for on all 4 sides. Your module frame outside dimensions will be 24”x48”, so you will need to cut your foam to 22½”x46½” so it will fit snugly inside the frame and will rest on top of the end support braces we cut in the beginning.
This about covers all of your cuts and holes you need to drill. I’ve tried to be as specific as possible in my directions, but if you have a question, please post a comment here or email me and I will help you along.
In the next session, we will get to the good part, assembly. If all of your parts are cut to the correct dimensions and all of your holes are drilled in the correct locations, you should have your module assembled in about 30-45 minutes or less.
Good luck with your cuts and drilling. Happy modeling!
JohnIn the next session, we will get to the good part, assembly. If all of your parts are cut to the correct dimensions and all of your holes are drilled in the correct locations, you should have your module assembled in about 30-45 minutes or less.
Good luck with your cuts and drilling. Happy modeling!
Saturday, October 17, 2009
Live Steam
A few weeks ago, there was an ad in the newspaper for an auction. And in this auction, they were selling a 1/5 scale locomotive and NCR (National Cash Register) train replica. You know, the size you can ride. Now, I have not seen this equipment, and I didn't make it to the auction, although I sure wish I did. But it got me thinking, we have about 3 to 3.5 unused acres here, how cool it would be to build a 7 1/4" gauge railroad.
Now, our land rises from about the middle to 5-10 feet to the north side and we have a 1/4 acre worth of pond on the west side in the middle. So I think I have a challenge developing a track plan. But if money were no object I would love to build something. With the track itself at about $5 a foot for rails, ties and hardware, I would estimate the cost being somewhere around $25,000 for what I would want.
If I do get a chance to build something, I will be sure to post some how-tos about it. First, I need to design a track plan, which will take a lot more work than a typical layout for HO scale. So, after I finish the module building series, you may see a few posts on at least ideas I have.
Only time will tell.
Now, our land rises from about the middle to 5-10 feet to the north side and we have a 1/4 acre worth of pond on the west side in the middle. So I think I have a challenge developing a track plan. But if money were no object I would love to build something. With the track itself at about $5 a foot for rails, ties and hardware, I would estimate the cost being somewhere around $25,000 for what I would want.
If I do get a chance to build something, I will be sure to post some how-tos about it. First, I need to design a track plan, which will take a lot more work than a typical layout for HO scale. So, after I finish the module building series, you may see a few posts on at least ideas I have.
Only time will tell.
Subscribe to:
Posts (Atom)
